How to Connect My AirPods to My Laptop: Just turn on your AirPods, open your laptop’s Bluetooth settings, find your AirPods in the list, and click “Connect”. That’s it!
Feeling stuck trying to get your cool AirPods working with your laptop? Don’t worry! Connecting them is much easier than you might think. Whether you have a Windows laptop or a MacBook, this guide will show you exactly how, using really simple words. Let’s get your AirPods talking to your laptop in just a few minutes!
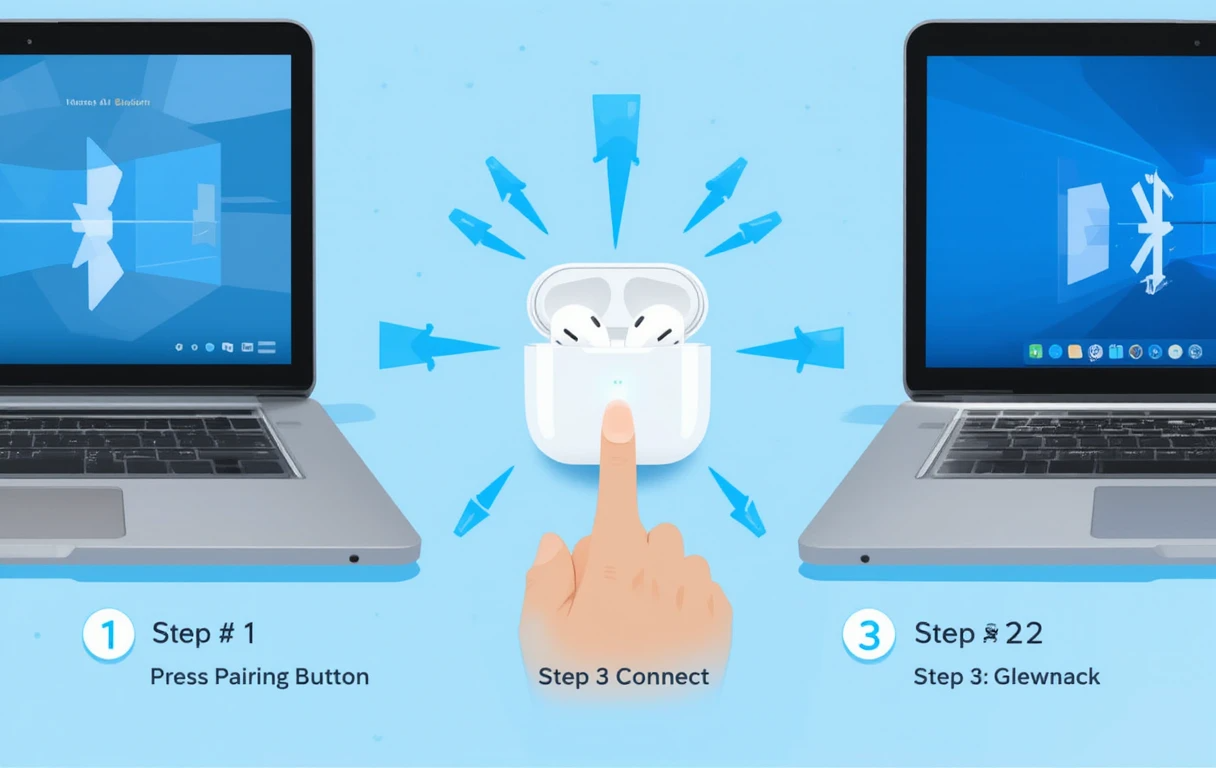
Step 1: Get Your AirPods Ready 🎧
- Put Them in the Case: First, put both your left and right AirPod into their charging case. Make sure the lid is open.
- Find the Button: Look on the back of the case. There’s a small, round button.
- Press and Hold: Press and hold that button on the back. Keep holding it! You’ll see a little white light start flashing on the front of the case. This flashing light means your AirPods are now in “pairing mode” – this is like them shouting, “Hey laptops! I’m available to connect!”
- Keep Holding: Keep holding the button until the light keeps flashing white. You can let go once it’s flashing steadily.
Step 2: Open Bluetooth on Your Laptop 🔍
Now you need to tell your laptop to look for your AirPods. This means opening the Bluetooth settings. It works a little differently on Windows and Mac laptops:
On a Windows Laptop (Like Dell, HP, Lenovo):
- Click the Start button (the Windows icon in the bottom left corner).
- Click on the Settings icon (it looks like a little gear ⚙️).
- Inside Settings, click on “Bluetooth & devices”.
- Make sure the big switch next to “Bluetooth” at the top is turned On (it will be blue).
- Click on “Add device” near the top.
- A new window pops up. Click on the first option: “Bluetooth”.
On a MacBook (Apple Laptop):
- Click on the Apple menu icon (🍎) in the very top left corner of your screen.
- Choose “System Settings” (or “System Preferences” on older Macs).
- Click on “Bluetooth”.
- Make sure Bluetooth is turned On (the switch will be blue).
Step 3: Find and Connect to Your AirPods ➡️✅
- On Windows: After you click “Bluetooth” in the “Add device” window, your laptop will start searching. Look for your AirPods in the list! They will probably be called something like “AirPods” or “YourName’s AirPods”. Click on their name in the list. Your laptop will say “Connecting”. After a few seconds, it should say “Connected” or “Connected voice, music”. You did it!
- On Mac: In the Bluetooth settings window, you’ll see a list of devices. Look for your AirPods name (“AirPods” or “YourName’s AirPods”). Click the “Connect” button next to their name. It might take a few seconds, but soon you’ll see “Connected” next to them.
Important: The first time you connect, you might see a message asking if you want to allow the device. Click “Yes” or “Allow”.
Step 4: Test It Out! 🔊
- Play some music or a video on your laptop.
- The sound should automatically come out of your AirPods! If it doesn’t:
- On Windows: Click the speaker icon 🔊 in the bottom right corner (near the time). Click the little arrow above the volume slider. A list of sound devices pops up. Choose your AirPods from the list.
- On Mac: Click the volume icon 🔊 in the top menu bar. In the menu that drops down, look under “Output Device” and select your AirPods.
Troubleshooting: If Things Don’t Work Perfectly 🤔
Sometimes, things might not connect right away. Don’t panic! Try these simple fixes:
- Check AirPods Battery: Are your AirPods charged? Put them in the case (with the lid open) near your laptop and try again.
- Restart Bluetooth: Turn Bluetooth OFF on your laptop, wait 10 seconds, then turn it back ON. Try connecting again.
- Move Closer: Make sure your AirPods case (with lid open) and your laptop are close together (within 2-3 feet).
- Re-Enter Pairing Mode: Sometimes you need to tell your AirPods to broadcast their signal again. Put them in the case, open the lid, and press and hold the back button until the white light flashes white again. Then try connecting on your laptop.
- Restart Your Laptop: Turning your laptop off and back on can fix many little problems.
- Reset Your AirPods: This is like giving them a fresh start.
- Put AirPods in the case, close the lid. Wait 30 seconds. Open the lid.
- Press and hold the back button for about 15 seconds. The light on the front will flash white, then flash amber (orange), then finally flash white again.
- Let go. Now set them up like brand new (follow Step 1 above).
- Check Sound Output (Again): Double-check that you selected the AirPods as the sound output (Step 4 above).
Also read: Can a stolen laptop be tracked? If yes, then how?
Apple Macbook Air M3 Price Updates
Helpful Tips ✨
- Automatic Connection: Once you connect them the first time, your AirPods should usually connect automatically when you open the case near your laptop (if Bluetooth is on). Just pop them in your ears!
- Which AirPod? These steps work for all AirPods models (AirPods 1, 2, 3, Pro, Max).
- Laptop Needs Bluetooth: Your laptop must have Bluetooth built-in to do this wirelessly. Almost all modern laptops do. If yours is very old and doesn’t have Bluetooth, you can buy a small, cheap USB Bluetooth adapter to plug into it.
- One at a Time: Your AirPods can usually only be connected to one device (like your laptop) at a time. If you want to switch back to your phone, you’ll need to disconnect them from the laptop or select them again on your phone.
You Did It! 🎉
Connecting your AirPods to your laptop is a simple process: get the AirPods ready to pair, turn on Bluetooth on the laptop, find them in the list, and click connect. Remember the short answer for next time! Now you can enjoy your music, videos, and calls wirelessly from your laptop. Happy listening!

